|

www.AstroMax.com
Up
Abstract
I. Purpose
II. Background
III. Orbits
IV. Period Determination
V. Methods
VI. Kepler's Laws
VII. Observing Suggestions
IX. Data Processing
X. Observer's Data Results
XI. Other Quad-A Results
XII. Conclusions
XIII. Attachments

This Project Jupiter Report
was prepared by
Mizar Consulting
Eugene A. Lanning
130 Hillside Terrace
Nebraska City, NE
68410-3740
[email protected]
Member of AAAA
AAAA
The American Association
of Amateur Astronomers
P.O. Box 7981
Dallas, TX
75209-0981
e-Mail:
[email protected]
www.AstroMax.com
| |
 Project
Jupiter Project
Jupiter
 
VIII. Data Gathering
Methods
C. CCD/Astrophotography Method
1. Accuracy
The basic techniques used here are the same as the Sketch Method, but
with the inaccuracies of the hand sketching removed.
2. Basics
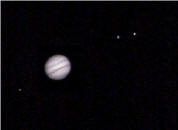
During each observing session the observer takes an astrophoto or CCD
image(s) that contains the moons of Jupiter. Later the separation on the
photo/image is measured and is then used as one data point in the
Jupiter Project data analysis.
3. Camera lens / CCD equipment Selection
Because the separation of the satellite in any given observation is
to be compared to other observations, there is a need to have a
consistent FOV from one observation to the next. The observer needs to
select equipment that as that enables the maximum separation of the moon
to be still on the images made during subsequent observations
14 without having to change
your equipment.
4. Magnitude Differences
Because the magnitude of Jupiter and its satellites varies
considerably, it is recommend that one image be taken of Jupiter with
its moons and a separate and lesser-exposed image of Jupiter be taken.
To image the satellites adequately the image of Jupiter is over exposed
and pixel bleeding makes the image of Jupiter larger than is really the
case. This contributes to position uncertainties.
It should also noted that the magnitude of Callisto is nearly a full
magnitude less than the other satellites. Thus, the image that contains
Callisto may need a slightly longer exposure. Particular challenges with
Jupiter are the low-contrast image and the strong limb-darkening.
Therefore, points to consider are:
- Adding many short exposures can be better than taking single
exposures.
- CCD chips are most sensitive in the near-infrared, so an
unfiltered image looks like a red-light image (with rather low
contrast though potentially fine detail), and may suffer particularly
from chromatic dispersion. Thus CCD users are encouraged to use an
infrared exclusion filter.
- Because of limb-darkening, some form of digital unsharp-masking is
needed to bring out the limb. Most observers process their images to
reduce limb-darkening and enhance contrast. Such image-processing
should be done judiciously with awareness of the artefacts that it can
create; check that there are not conspicuous rings around satellite
shadows, nor any saturated white areas in the image.
5. Image Scale
It is helpful if the field of view (FOV) of your equipment is
determined before the observing sessions begin. This is not a required
step, but enables fewer assumptions to be made in the processing of your
data. A variety of techniques may be used here, including creating star
trails on the images from a timed exposure with the drive turned off.
To determine the FOV, select a star near the celestial equator
(within ±5° of zero declination ) and make a timed exposure. Multiply
the exposure time by 15 to convert that clock time into arc-seconds (or
arc-minutes if timed in minutes), then divide by the trail length to
obtain the number of arc-seconds per pixel on the CCD electronic image
or per mm on astrophotos.
6. Data Preparation
Measure the separation of the selected moon from the center of
Jupiter on each of the images made. It is recommended that the familiar
inches and fractions be avoided by measuring the separations on the
images directly in pixels on the computer from CCD images, before prints
of the images are produced. Measuring in mm for astrophotos is
recommended. Avoid the tendency to "smooth" the data at this stage. If
on observation #5 the separation is 80 pixels, on observation #6 it is
95 pixels, and on observation #7 it is 90 pixels (went back down), that
is OK. Report the data as imaged. For each observation, record the
separation measurement (in pixels or mm ) on a separate line on the data
sheet (Attachment A).
|
|
 Project
Jupiter
Project
Jupiter