 Project
Jupiter Project
Jupiter
 
VIII. Data Gathering
Methods
B. Sketch Method
1. Basics
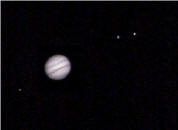
During each observing session the user makes a sketch on paper of the
positions of the Moons as seen in the eyepiece. Later the separation on
the sketch is measured and is then used as one data point in the Jupiter
Project data analysis. This method requires no special equipment, but
more observations than normal ( try to get around 20 ) are recommended
so that the inherit inaccuracies in any sketch may mitigated by the
abundance of data.
2. Eyepiece Selection
Because the separation of the satellite in any given observation is
to be compared to other observations, there is a need to have a
consistent FOV from one observation to the next. The focal length of the
eyepiece directly influences the FOV (as do other parameters that vary
between eyepieces ). Consistency of the sketches is enhanced when the
same telescope and eyepiece combination are used for all sketches.
3. Use a high power eyepiece for sketching.
The use of higher power eyepieces generally reduces the field of view
(FOV). The smaller FOV reduces the proportionality of the satellite
separation to the FOV, making the sketching as easy as possible. Details
of the planet surface features, while interesting, are not needed for
this project. Select an eyepiece that as that enables the maximum
separation to be still in the FOV during subsequent observations without
having to change eyepieces.
Observers using a telescope lacking tracking capabilities will need
to use a lower power eyepiece. That enables Jupiter and it’s selected
satellite remain in the FOV long enough to make a reasonably
proportioned sketch ( it is harder to make a good sketch the faster the
object moves through the FOV.).
4. Eyepiece FOV
It is helpful if the field of view (FOV) of your eyepiece is
determined before the observing sessions begin. This is not a required
step, but may aid the observer in estimating separations when the FOV is
known.
To determine the FOV, select a star near the celestial equator
(within ±5° of zero declination ) and time the star as it crosses the
diameter of the field of view. Multiply by 15 to convert that clock time
into arc-seconds (or arc-minutes if timed in minutes).
5. Use same size sketch circles
Because this method will obtain the separation between the satellite
and the center of Jupiter by placing a ruler on a sketch, each sketch
should be similarly sized. That is, for a given eyepiece that has a FOV
of say 30 arc-minutes, the sketches should consistently use the same
scale for the FOV.
For ease of recording data, it is suggested (not required) that the
observer use "The Astronomer’s Journal, An Observing Log and Sketch
Book", available from AAAA’s own
www.AstroMax.com. That
Journal has a convenient and consistent method of recording field
observations that encourages consistency and completeness of
observations.
6. Advanced Eyepieces
It is helpful in making sketches if an observer has a reticle
eyepiece ( an eyepiece with a built-in scale). This is a help, not a
necessary piece of equipment to the successful completion of Project
Jupiter. The scale on the eyepiece need not be calibrated in order to
make to scale sketched.
For those interested, both Meade Corporation ( see
www.Meade.com
and look for the Astrometric eyepiece at
about $150 ) and Celestron ( see
www.celestron.com
and look for the Micro Guide Eyepiece #9471) make such eyepieces.
Another option is to see if another member of your local astronomy club
would be willing to loan you one for this project. As stated, these
eyepieces are a sketching aid, not a requirement for the successful
completion of Project Jupiter.
7. Data Preparation
Measure the separation of the selected Moon from the center of
Jupiter on each of the sketches made. It is recommended that the
familiar inches and fractions be avoided by measuring the separations on
the sketch in mm. Avoid the tendency to "smooth" the data at this stage.
If on observation #5 the separation is 5 mm, on observation #6 it is 8
mm, and on observation #7 it is 6mm (went back down), that is OK. Report
the data as sketched. For each observation, record the separation
measurement ( in mm ) on the data sheet (Attachment A).
|

 Project
Jupiter
Project
Jupiter